Kitty Hawk 1/44 CF-101 Voodoo
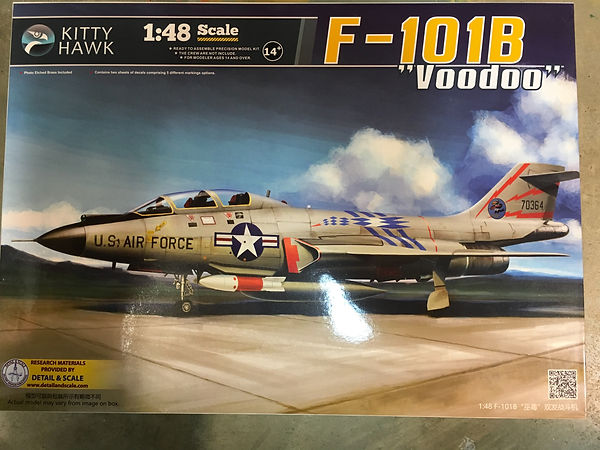
I found this kit at Fine Scale Models in Pentiction, in 2018, shortly after it was released. Initial reviews weren't overly complimentary. Kitty Hawk had a reputation for overly engineered, complex kits with too many options, resulting in difficult fits. Instructions also tended to be poor, with wrong parts numbers and vague locations. It all applied to this kit. In particular, the multi part fuselage tended to result in either gaps or steps at the intakes and behind the cockpit. Forewarned of potential problems, the kit was opened.

The kit was started February 4, 2019 and completed October 19 2019. Other than the fiddley undercarriage, it was a enjoyable build that rewarded patience. The kit included 6 different marking options, with 5 for American jets and one for an early RCAF jet. It also included a nice fret of photo etch, including instrument panel and consoles, seat belts, and engine details. Some Belcher Bits aftermarket decals were used, partly to correct errors in the kit decals, and partly to replace damage from builder errors.
Fuselage - Part 1
Unlike most airplane kits, the build started with the fuselage rather than the cockpit. The kit was designed to model multiple versions, including single and dual seats, using a common central fuselage section and changing the cockpit and engines as necessary. For this kit, the central section was from the common moulding, while the front cockpit and the rear engine areas were kit specific. This maximized the mould for Kitty Hawk but increased complexity for the builder.
Construction began with the intake trunks and the rear engine faces, built on the central fuselage floor. This was then joined with upper right and left fuselage sections. Reviews indicated that the fuselage to tail joint was problematice, but dry fitting showed no problems. The upper tail cone area needed some sanding and fussing to get a good fit. Reviews also suggested the wing to fuselage fit was problematic, but dry fitting showed it could be successfully done with care.
The photo etch on the engine face, shown in photo 6 below, was almost the death of me. It took multiple attempts to get it right, and several times I thought I had screwed it up. The flat PE needed to be rolled into a cone around the plastic nozzle and fixed into place. Once glued. small tabs had to be pulled out, folded and into a triangular shape, and then glued back to the nozzle. The first nozzle was completed but the second refused to glue into place. I thought it was screwed up beyond salvaging but was finally able to get it more or less into place. A good thing they are buried deep and unable to be easily seen.
Cockpit
The cockpit was of traditional construction. Seats were multi part, with photo etch for the seatbelts. The kit also included photo etch for the instrument panels and the side consoles. Reviews noted that the side panel consoles were too wide, and they certainly appear very wide once together, but looked fine when painted and installed. Decals were supplied for the instrument panels but the side consoles had to be painted. A toothpick and coloured pencils were used to paint the various buttons and switches.
The kit included a separate radar, as well as options to open several electronics bays along the nose. The moulded parts provided the necessary shapes but were lacking any real detail. Photos of the real thing showed masses of wires that would be challenging to model. I prefer a clean look anyway, so chose to close all the bays up. Fortunately, the complex piano hinges used on the equipment bay doors all fit nicely, with only a little filler needed in a couple spots.
Fuselage - Part 2
With the cockpit and nose complete, it was time to join the fuselage components together. A lot of trial and error, with much sanding, was needed to get a good joint between the nose and the fuselage sections. With patience, and a lot of test fitting, a good joint without any steps or gaps was achieved. The same couldn't be said about the intakes, which needed clamps to hold them while the glue dried. Once dried, a lot of sanding and filling was needed to improve the fit. The sanding destroyed all the panel lines and riveting details, making it necessary to rescribe and rerivet the intake exteriors to restore the lost detail. Installing the speed brakes in the closed position, typical for a parked Voodoo, was also challenging. The doors didn't fit well, with gaps around the perimeters. Worse, the closed doors sat too deep in the opening. Blue tack was used to set them at the correct height so they could be glued into the proper position Much sanding and filling was stilled required, followed by rescribing and reriveting.
The kit gear doors were test fit to see if they could be used to mask the gear bays for painting. The fit wasn't tight enough to make a good seal, so the bays were masked instead. The flaps, held in place with a little blue tack, did work as masks, saving a lot of extra masking. And with that, the model was ready to paint.
Painting and Finishing
Cancellation of the Avro Arrow left Canada without a dedicated, high speed interceptor. After a typical Canadian procurement process, the MacDonell Voodoo was selected. Unfortunately for Canada, the "quick" procurement process took too long, and the MacDonell production line was closed before the order was placed. Canada's Voodoos were therefore second hand USAF jets essentially on loan. The jets arrived in two batches, with the first batch going back and being replaced by a second batched when the first batch began experiencing end of life airframe issues.
The Voodoos arrived in a natural metal finish. In some cases, traces of the old American markings could still be seen. Later on, the planes were painted in "Canadian Voodoo Grey", a colour apparently unique to Canada and extremely hard to find in model form. I really wanted to model a version with the the RCAF lightning bolt and the "Royal Canadian Air Force" lettering spelled out over the top of the wing. This pretty much dictated an airplane in the first batch in a natural metal finish. Fortunately, the kit decals included markings for an early RCAF plane, including the lightening bolt and Royal Canadian Air Force lettering.
Alcald black base was used as the base layer. I had problems getting a glossy finish, as the paint dryer with a pronounced rough texture. Sanding thru finer grades of sand paper was needed to flatten the black paint and restore the shine. Tamiya polishing compound was then used to really put a shine on it. Even with all the prep, several areas required attention, and one seam needed to be repaired.
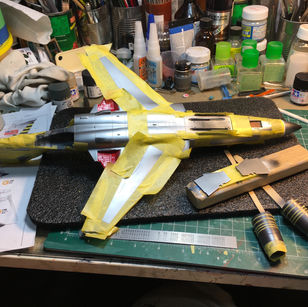
Pictures of early Voodoos clearly showed different sheens, with some panels being noticeably lighter or darker. Alclad Aluminum was used as the base colour, before three painstaking hours of masking to highlight selected panels for different shades of metallic paint. The result, once the tape was removed, was subtle but worth the effort.
Decals and Final Assembly
My preference is to model aircraft based in Western Canada, and ideally from Cold Lake. Early Voodoos weren't formally based at Cold Lake, so another option was required. Comox was the only Western Canadian base used by the first batch of Voodoos, so a Comox based plane it would be. Several pictures of 395, one of the included kit decal schemes were found, cementing the markings choice.
Several of the kit decals, including the roundels, were incorrect. These were replaced with a set of Belcher Bits decals.
A fair bit of extra effort was applied to the exhause cones and underside of the tail. Pictures show the metal to be heavily heat stained, with no two aircraft the same. To achieve this effect, the exhause nozzles were masked several times to allow different metal shades to be applied. The metal panels on the underside of the tail went thru similar efforts. The result was close but never seemed to quite match the variegated effect seen in photos.
There were two minor disasters as the model was being finished. The first was the unintentional destruction of the red ensign and code numbers on the tail, which wrinkled when an oil wash was applied. The Belcher Bits set came to the rescue with replacements. The second disaster was the complete destruction of the nose pitot, broken into several pieces during final handling. A turned brass replacement was obtained from Hannant's. A word of warning - the brass pitots are sharp, and will stick deep into your finger rather than break like the plastic versions. Don't ask why I know.
Belcher Bits has a dedicated decal set for the prominent canopy seals. I didn't order them as the kit decals included them. Unfortunately, the kit decals seemed to belong to a different plane, requiring extensive cutting and adjustments to fit. They looked okay in the end.
The finished model is huge, barely fitting on my display shelf. It absolutely dwarfs a Spitfire, being almost twice as long. It took a lot of work but I am happy with the finished model.
Only one picture of the finished model was taken. I will need to rectify that some time and add some more.


