Grain elevators and airplanes
- paddleriver
- Aug 23, 2020
- 7 min read
AUGUST 14. Got to love sunny Friday’s. Today is a scheduled Friday off. The perfect time to head to the basement for a couple hours at the workbench before I need to do real work again.
Made some progress on the grain elevators, as well as the A220.
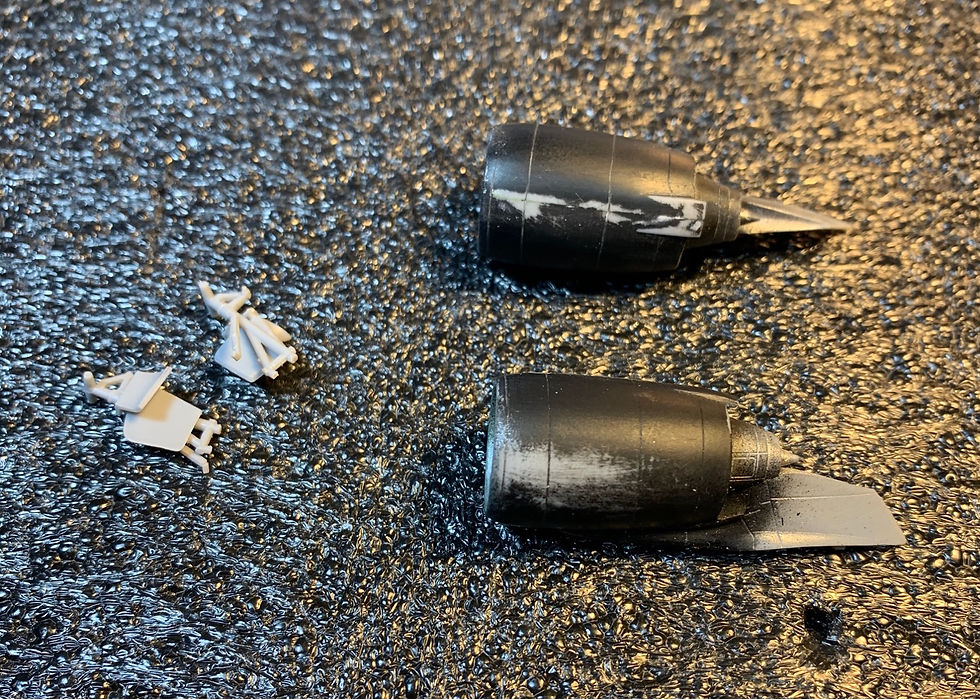
Assembly of the A220 is essentially complete. The main assembly is finished and ready for primer. The engines have been built, and I have started to paint. The main landing gear are assembled, and ready to prime. The nose gear is about the only thing left to build.
The yellow paint on the Buffalo is finished. Using pink as a primer for yellow worked really well for the yellow Pioneer grain elevator roof pieces, so I will definitely do that for any future yellow airplanes. The Buffalo took quite a number of coats to get satisfactory coverage. The yellow needs to be polished and then I will need to mask for the red high vis areas and the black de-ice boots. The masking will be a lot of work and I haven’t built up the necessary enthusiasm to tackle it yet.

I have learned a number of things from cutting and applying letters using the white decal film”
The first lesson was that you need to separate the letters. I had intentionally set up the cutter to cut the decal film but not the backing paper. As you can see in the picture below, the letters and the surrounding decal waste are all still on the backing paper. When you put the whole thing into water, everything loosens and you have to separate the part you want - the letters - from the part you don’t. This is relatively easy when cutting a mask. You just have to “weed” out and remove the parts you don’t want, leaving the parts you do. On the decal, surface tension enters the picture. Moving any part of the wet decal means moving every part of the wet decal.

A surprise learning is that the decal film is “sticky”. I like using a sharp object, like a toothpick or tweezers, to move decals around. Unfortunately the decal tends to stick to whatever I am using. Trying to weed the letters from the backing has inevitably meant that something sticks, and then everything sticks. I have figured out that gently lifting a corner of the waste allows the entire waste area to be gently lifted and slowly peeled back. A wet paintbrush needs to be kept at the ready to push back any letters that get caught up in the waste. I think it would work better if I was to cut thru the backing paper so the that the letters are separated out. Then each letter could be separately placed in the water and applied. This gets rid of the need to weed the letters from the waste area.
The letters are cut directly from a sheet of white decal paper. There is no carrier film, so the letters are quite flimsy and, without the carrier film, there is nothing to make them hold their shape. This makes placing them difficult, as they are very flexible. Trying to move the letter into position, or straightening a letter out, often results in the letter sticking to the tweezers. A wet paintbrush has worked well to gently straighten letters, but doesn’t have enough force to move a letter across the clapboard.
Letters don’t like being moved up against clapboard. The bottom edge of each board becomes an effective step that is difficult to move a letter across. It is much easier to move letters down. The natural response is that you should start at the bottom of the lettering and work up. It’s a good idea in principle hard to put into practice. The first issue is that it is much easier to get everything in the right spot when you work from the top down. The other problem with working up is that all the wet letters are under you hands when adding the next rows. Being somewhat clumsy means that things get bumped and have to be straightened. And if you think letters stick to tweezers, you should try and remove one from fingers!

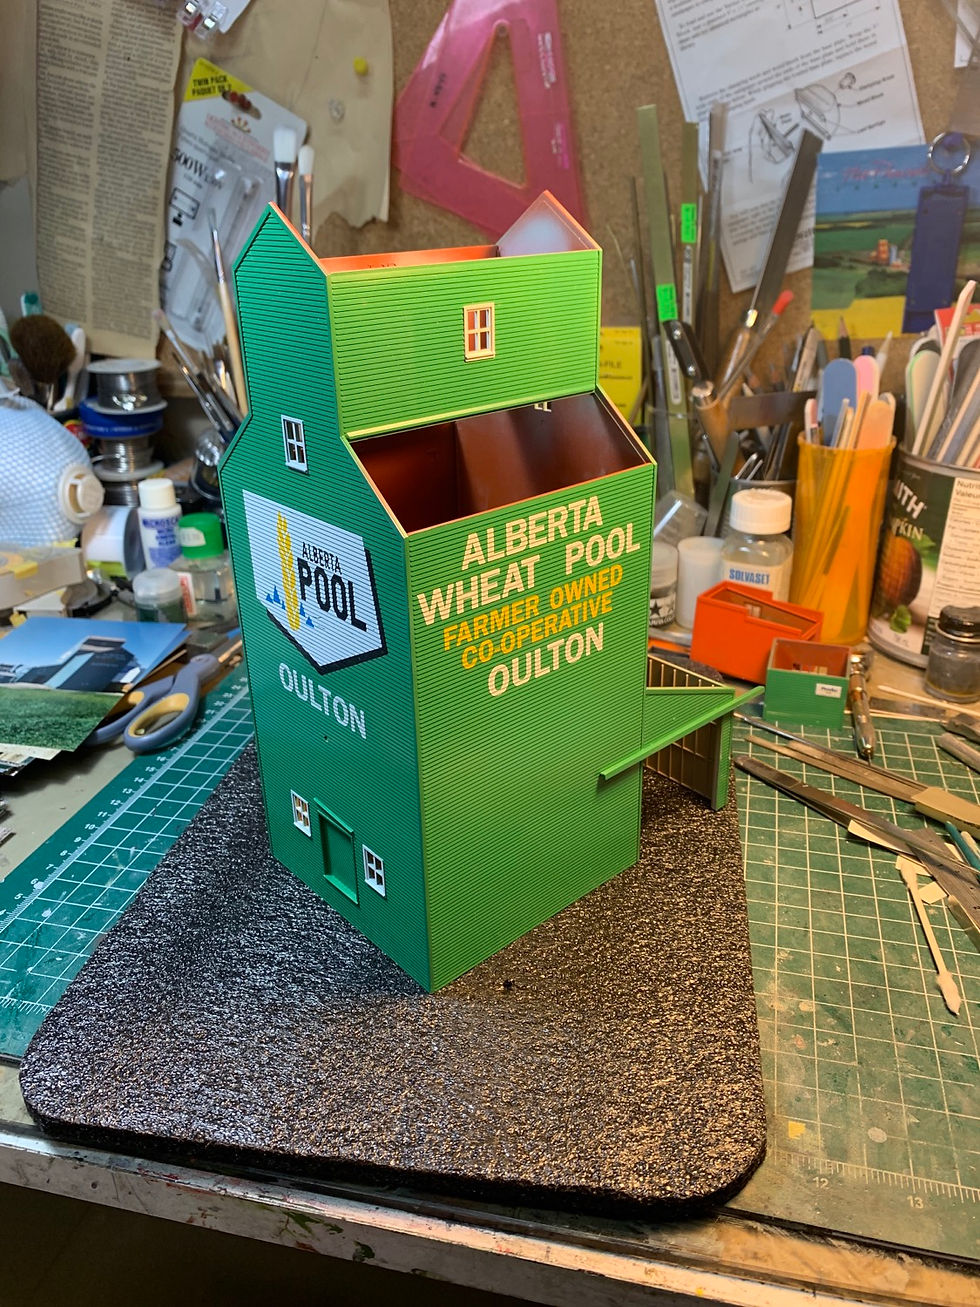
The other thing about grain elevators if that they prominently display the town name. I really hadn’t decided on a name, though I had toyed with several names thru the years. The layout in Calgary used the name “Avardon” for one of the town’s. I liked that it was a way to recognize Avard Oulton, one of my grandfathers. But the name never quite felt right to me. It felt like it had too many syllables. Alberta place names are frequently based on people’s names. Two syllable names seem more common, and simply using Avard fit better. After further thought, I decided to use the last name, Oulton. This was a better way to honour an entire side of my family, as well as one of my children, Daniel Oulton Keys. And I liked the way it ended in “ton” as that seems to be a common suffix for prairie towns. So the model town of Outlon was born. Now I just have to figure out how to somehow work Keys, and the names of my other two children into the layout.
AUGUST 23
It’s been a couple weeks since I last posted, so time for an update. Not a lot of time at the bench recently - too much work, nice weather, and despite by best intents, summer playoff hockey games. It has rained heavily the last couple days so time to add some progress.
Decalling on the Alberta Wheat Pool elevator is complete, and I have made first efforts to apply an oil based weathering. The weathering has dirtied it up a bit. I will let if sit for a bit to see what is next. Pictures are are a great tool, as I can see that some additional blending and clean up is required after looking at the pictures.


The Pioneer elevator is a little further behind. Decals was an exercise in patience, but now complete. I wondered if it would be better to cut the decals as individual letters and apply each separately. The cutter did a good job, but applying each letter didn’t prove any easier. I found that it also proved too easy to loose spacing between each letter. I eventually figured out that it was easiest to score each letter, cutting thru the decal but not the backing, soak the entire word, then remove the excess decal around each letter. This left the decal word intact on the backing paper, ready to be slowly nudged, letter by letter, into place. I can tell you that nudging letter “E” into place isn’t easy. The next challenge was to get the decal letters to sit down in the corrugations was a lot of work. I eventually resorted to slitting each corrugation, then applying decal solution. It still look pushing and poking with the bristles of a wet paintbrush to get the decals to bed down into the corrugations. Next step is to seal the decals and paint so I can apply a wash.


Some progress on the A220. I sprayed the first layer of white primer to see how well I had done filling gaps. Overall, it was pretty good, but there was work needed around the wing to fuselage joints, and the cockpit clear piece. Out came the sanding sticks, then putty, and then the sanding sticks again. Things looked ready for another prime attempt, and another layer was sprayed. I was happy with the results. After drying, the primer was polished and is ready for paint.
No progress on the Buffalo, unless you count looking for the prop blades as progress. The blades were clamped in alligator clips to paint the main black colour. I had left the clips stuck in the holder, and naturally knocked it on the floor several times. Today, I got as far as looking at what the next steps would be, and realized that none of the blades were in the alligator clip holders anymore! Thankfully, a 15 minute search found all 6 blades, now resting on the mat next to the model. I really need to get some kind of container to hold loose parts, to safely hold all the bits and pieces, given I seem to work on multiple things at a time. But I can feel the Buffalo calling, and will get started on masking when the grain elevators are done.

I have started to think about what to work on next. This is actually one of the most enjoyable parts of building. Everything is possible before it is started. Every kit remains pristine, unlimited possibility. Each one will be my best build ever. So I get to dream and look at the parts, and look at the parts, and think about how much I will enjoy creating my next masterpiece. For now, I am staring at the following possibilities:
a 1/144 F-RSN CL-44 in Flying Tiger coloUrs. F-RSN are notoriously short run kits, and it is pretty obvious when looking at the plastic. This will be a difficult build, made harder by a shiny natural metal finish.
a 1/144 CRJ900 in new Air Canada colours. This looks like a really nice kit.
a 1/144 Airfix 737 in the blue tail Pacific Western speedbird scheme.
1 1/48 Mustang. Either the new Airfix or Eduard kit. Both are supposed to be really wonderful builds. Too many RAF temperate land scheme brown and gray kits on the shelf, so this one would need to be something different.
1 1/48 Tamiya Spitfire Mk1. A really beautiful kit in the box, and the reviews are glowing. I want to do this as a 403 squadron plane. About a year ago, when building the Airfix Tomahawk, I realized that the aftermarket decals I had were 403 ”City of Calgary” squadron. That prompted an internet search to learn more. The Tomahawk was the first aircraft used, after the squadron was formed in England in 1940. They converted to Spitfires, working thru Mk 1 thru Mk XVI before being disbanded at the end of the war. It was reformed in the early 1950’s as an auxiliary squadron, flying P-51s. They later converted to a transport squadron flying the Expeditor, before converting to tactical helicopters. They worked their way thru various versions of Bell UH-1 and are currently flying the Griffin. For some reason I have the urge to build one example of each plane used by the squadron, and recently found a picture of a Mk I in 403 markings.
Let me know if you have any suggestions!


Comments