October 2026
Marie and I celebrated our 35th anniversary October 4th. We ordered in that night, with the intent on going out later in the week, but never got around to it. Time is obviously relative, as it doesn't seem possible it's been that long. Thank you to my wonderful wife. First, for saying yes, and then for putting up with me ever since.
This month I went to two model shows. The first was the Calgary GOMBs show on the 3rd. Next day was the Edmonton train show. GOMBs seemed smaller than previous years but had some fantastic models. The Edmonton Train Show is smaller than Calgary‘s but still had some great displays and was well worth the drive.
Marie wanted to have a family Thanksgiving, but that’s a bit of a challenge when your empty nesters. With no kids left in Calgary, she decided she needed to invite my brothers. Like every Thanksgiving, there was too much food left after every one had stuffed themselves.
We went to the Special Olympics "Breakfast of Champions" at the Saddledome on October 20th. We were guests of our friends Ed and Darlene, who had a table on behalf of the Kiwanis. We had to be there at 6:30 am, so it was an unusually early start. The Flames were the gold sponsor, with Ryan Huska, Michael Backlund, Zach Whitecloud and Adam Klapka attending, along with most of the Flames TV personalities. Our table "celebrity" was Dylan Howe, the president of the Calgary Surge basketball team (Calgary has a basketball team?) while Makela was our Olympian. She had won something like 25 gold medals from 3 different world championships - a most impressive achievement.
I put up the outdoor Christmas lights on the 19th. It was the perfect day, hitting 21C in the early afternoon. Next morning, coming out the front door, Marie found several strings of lights laying across the sidewalk. Thinking it might have been someone trying to steal our lights, I checked the security cameras. Sure enough, our culprit was caught on camera. A male deer, with an impressive antler rack, got tangled up in the lights, and pulled them down in a panic to get away. That's a first. Fortunately it appears neither deer or lights were damaged, and everything was back to normal later that day.
Winter arrived on October 23, with rain and then snow. It was the second snow of the season, but it felt like it meant it this time. Temperatures dropped from the upper teens, where it had been for most of the month, to barely above freezing for the last week of the month. The winter tires went on the Volvo on the 23rd, a couple weeks later than normal. The Suburban followed, getting the tires installed on the 27th.
We got our flu shot on the 28th. We had hoped to also get our COVID shot but the pharmacy didn’t have enough supply. There was more coming in the next day so we booked an appointment for November 1. I almost always react to the covid shots and this time was no different. Thankfully it wasn’t as severe as other times, with just a general feeling of tiredness for most of the day. Marie never reacts but had a reaction to the flu shot, feeling achy and cold for a couple days..
Halloween closed out the month. We had treats for 350 kids last year, and ran out about 7:30. Neighbours later told us they had more than 600 kids by 8. Having the door open the many times doesn’t seem like a winning solution with four dogs. Last year, the weather was quite nice, so Marie set up a table, grabbed a chair, and handed out treats by the garage. We ended up doing the same thing this year, and had ran out of treats just before 8. We had almost 530 kids by our count.
KP Crane
The completed cockpit was installed into the right fuselage half. The rudder pedals needed some trimming to allow the instrument panel to be mounted, which in turn allowed the fuselage to close properly.
The two cockpit halves mated reasonably well, but one side proved slightly longer than the other. Final position was set by lining up the upper edge of the cockpit, with the thought this would reduce the work needed to fit the windscreen. That allowed the nose to line up, forcing any length difference to the tail. Black CA was used as filler to help close gaps. The tail was then sanded to ensure the two halves lined up properly.
A test fit of the wing to fuselage joint found a number of issues. A lot of material had to be removed from the fuselage opening to allow the wing to sit square to the fuselage. With the wing sitting square, it became apparent that there would be large gaps, on both sides of the upper wing to fuselage joint (Photo 2 below). Plastic strip was added to each upper wing, then sanded flush, to reduce the gap (photo 3 below).
Mating the wing to the fuselage showed that three total be a large step between the wing and fuselage, visible as a black edge in Photo 3 below. Adding styrene strip spacers to spread the wing was partially successful. Sanding the underside of the fuselage mating surfaces further reduced the step.
The instructions required the landing gear be assembled, then installed onto the wing, then covered by the engine nacelles. This felt like a sure fire way to break the gear two or three times but I could find no way to add the main landing gear after the engine nacelles were installed. The gear pieces proved so fiddley I was barely able to install them without the nacelles. So the instructions were followed, and the nacelles were installed over the landing gear (Photo 5). Remarkably, the gear survived the rest of the build without damage.
The canopy was a reasonably good fit but needed a little filler to blend in the edges .
The upper wing to fuselage joints worked out pretty good, but the bottom had some pretty large gaps. Black CA was used to fill the gaps, providing a smooth joint while adding strength.
Photo 1 - The fuselage's wing opening required removal of a lot of material to square up the opening.
Photo 2 - Big gaps between the fuselage and wing will need fillers
Photo 3 - Strip added to the wing root (white). Now to address the uneven wing root (black)
Photo 4 - Spacers added to raise the top of the wing.
Photo 5 - Gear and nacelles installed.
Photo 6 - Canopy installed. Upper wing joint looks pretty good.
Photo 7 - But the bottom wing to fuselage joints need a lot of black CA to fill gaps.
Photo 8 - Joints filed and rescribed
Photo 9 - First primer coat found some repairs
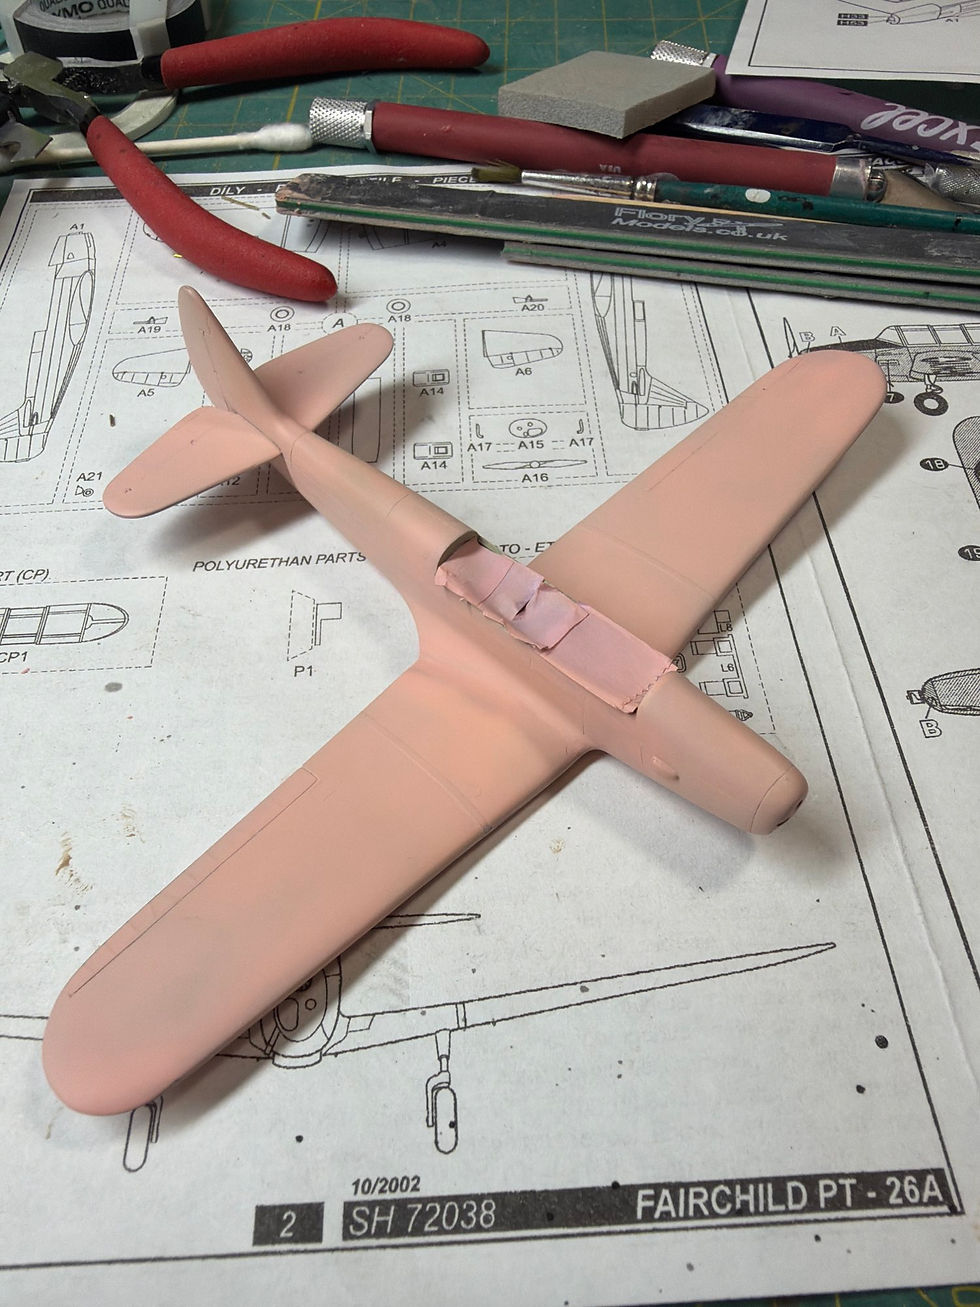
With repairs complete, a second white primer coat was applied, followed by two light coats of RAF Trainer Yellow. The white primer lets the yellow cover better, while giving a less "warm" undertone compared to the pink primer used on the other two builds.
The decal sheet didn't include anything for the black anti-glare nose panel, so it was masked and sprayed. Happily, the masking was removed without pulling up any of the black paint.
It had previously been decided to paint the plane as serial 7942, a Calgary based Oxford. The kit supplied decals included serial 7942, so it was a matter of removing the last digit and replacing it with a 1. A search of all my decals couldn't find any numbers that matched the kit numbers. Some appropriate thickness decal stripes, from the wing walk markings of a 1/24th Spitfire were found, so appropriate lengths were cut and applied with convincing results. The decals proved to be quite stiff, but worked until the tail fin flashes were applied. These had some fracturing, and absolutely refused to bend over the fin's leading edge. They finally conformed after several applications of Mr. Mark Softener Extra Strength (who comes up with these product names?). Appropriate colour matches were mixed up and the damaged decal was touched up with paint.
Photos 1&2 - Repairs in progress
Photo 3 - Two thin coats of yellow, sanded to remove fuzz.
Photo 4 - Nose panel masked
Photo 5 - Nose anti glare panel painted
Photo 6 - Decals complete
The decals were now sealed with a coat of Aqua Gloss. An oil wash, using starship filth, was applied, allowed to almost dry, and then wiped off. This nicely highlighted the panel lines and details, and provided a nice patina.
It appears some of the real planes had antenna while others didn’t. This might be simply a matter of timing, with antenna and aerials being used early in the war, but removed later when better radio equipment became available. With no photos of the real planes, it was decided to leave the antenna off.
Wheels were now painted and attached, as were the props. The props supplied in the kit represent metal props, while the real plane had wooden props. I don’t have any spares so went with the kit props
The model was now sprayed with AK semi matt gloss. The real planes would have left the factory with a gloss finish, but time and constant use would have dulled things down. The semi matt gives a nice representation of this effect. And with that, the plane was done.
This was an enjoyable build, and I am happy with how it turned out. Enjoy the pictures.
Pavla Oxford
The selected plane was chosen based on a painting from the book "The BCATP in Calgary". By chance, I found three photos of the actual plane while searching for for something else. The photos confirm the painting details.

Photos of the actual plane. Note the third picture shows it mounted on skis.
I did not have markings for the chosen airplane. The roundels and fin flashes were source from spares. Close decal matches were found for the serial numbers and the nose numbers. Afer much searching, nothing close could be found for the large fuselage numbers and the underwing serials, so mask were cut and applied (Photo 1 below).
The kit decals were only used for the black wing walkways. They proved stiff, unwilling to settle down, and resistent to all decal softeners. They then began to shatter when I attempted to force them to settle. Multiple applications of softener finally got them down. Black paint was used to touch up the damage.
Roundels and fin flashes came from a Xtradecal set. The roundels went on without problem but one fin flash shattered, requiring a small piece of another decal to repair the damage.
Lately I have been having problems with my masks pulling up paint when removed. This was especially bad on the starboard fuselage "24", eventually requiring it to be striped and repainted. Mask removal once again pulled up paint in a couple spots, which were touched up with slivers of black decal.
The decals were sealed with a coat of Aqua Gloss. Control surface joints were highlighted with Tamiya black panel liner. Light weathering was appropriate as these planes were well maintained but saw incredibly heavy use. AR844 is shown to have flown 2724 hours in a little over three years use, equivalent to almost 4 hours flight time a day! An oil wash of starship filth and payne's grey was used to give an impression of use without being overly dirty.
Photo 1 - Masks were created for the fuselage number and the underwing serial numbers
Photo 2 - Masks and decals complete
Photo 3 - Control surface lines have had black panel liner applied, and an overall oil wash has been applied
Photo 4 - Installing the main gear could have used an extra hand
Photo 5 - On its gear.
Photo 6 - Canopy masks removed
All that was left was to install the final details, including the props, pitot and landing light cover. The landing light cover was an unexpected challenge. It had been discovered much earlier in the build that the supplied vac form cover wasn’t even close to the right size and shape. My normal solution would have been to use a solid piece of clear sprue, glued in place and sanded to fit, but the light bay had nice detail that I didn’t want to lose. I tried using clear packing tape, sticking it down over the opening, then trimming to fit. It worked remarkably well. The supplied exhausts seemed really crude, but seemed to match photos, so was used. The exhausts was challenging to figure out how to install but were eventually stuck in place. The final add was to install the very tall antennae and string the radio aerial. The pitot disappeared sometime during final detail install, so a new one was made from stretched sprue. With that, the plane was done.
This turned out to be a much more challenging build than expected. A lot of effort was needed to get the vac form transparencied to fit, and that began to dull the build’s enjoyment. Not my best effort but it looks good, sitting on the shelf with the other yellow planes. I have another Oxford, from a different manufacturer, so perhaps some day this build will be upgraded.
AIRFIX Avro Anson
The Airfix Anson is a very old kit. Scalemates shows it was first released in 1962. This boxing appears to have been released in 1994. For a then 30 year old kit, the parts were well moulded, with limited flash. The kit has working ailerons, landing gear and ball turret, features I distinctly remember playing with on a version my Dad built. It also has a number of known foibles, with the worst being the incorrect fabric effect on the wings and fuselage.
The interior is pretty simple but relatively complete. The kit includes a pilot, radio operator and navigator figures, so these were painted up and installed (See Photo 1 below). Things went well until it was time to install the fuselage side windows. The opening was quite large, with no framework supporting the front end, allowing the roof to be quite flexible. Tamiya Extra Thin was used to try and get as strong a bond as possible, but the clear plastic windows seemed reluctant to bond. It was finally necessary to tape the roof to the lower part of the fuselage so that everything stayed in place while the glue dried. The first effort wasn't successful, so a second effort reinforced the internal joints with CA. This worked on the starboard side but the port side popped out while being handled. A third attempt appears to have worked but it was decided to mask up the windows before joining the fuselage halves, making it easier to reglue the windows should they came out again.
The side windows were scanned, with the scan being traced to create masks. This worked surprising well (See Photo 2).
The turret was a different challenge, as it was totally bare of any frame marks. Framing was created using strips of Tamiya tape, then the "gaps" measured up, averaged and then transferred to the mask drawing program to create masks. Initially this seemed to work but a closer look showed that the “gaps”, representing the metal frame, were much too thick. Google Gemini says that the frame would be 0.7mm wide in 1/72 (seriously? How does it know that?) versus the 1mm that had been used. The cutter was used to create 0.7mm strips and the turret was reframed. The end result looked much better.
Photo 1 - Not much to the interior
Photo 2 - The large side windows masked
Photo 3 - Reverse framing image made from tape
Photo 4 - Proved the concept but the gaps are too wide.
Photo 5 - Second try looks better.
Photo 6 - The turrent has been painted, ready to install
The side windows continued to be a problem, with both sides cracking several times. Even CA didn’t seem to solve the problem. Here’s hoping the rest of the building can be completed with out any further cracking. Hint - there’s more cracking.
Test fitting the turret found an unexpected issue. The lower masking would extend below the fuselage, making it difficult to remove. Some select sanding opened up the gap enough that the turret could be installed after the fuselage was joined and painted. This should also help prevent the turret machine gun from being destroyed during the coming handling.
Initial test fits of the fuselage sides showed that a lot of work would be needed to get acceptable joints. Initial joining of the fuselage halves needed a lot of clamps to get the two sides to touch. It is very clear that filling and sanding the gaps on the underside would destroy the kit’s fuselage ribbing detail. The upper joint isn’t as bad so it may be possible to protect most of it. The kit ribbing is a little overdone so some sanding is necesssary to tone it down. But I don’t know of any easy means to restore ribbing detail so the bottom will likely be left smooth.
As noted earlied, the wings are moulded with prominent ribbing detail. A nice effect but the Anson wing was finished with plywood, rather than fabric. This would create a smooth surface, so the ribbing detail will have to be sanded off.
The underside colour is yellow. The engine nacelles were sprayed yellow in an effort to reduce masking. The instructions require the landing gear to be installed before mating the two wing halves, which could make for tricky masking. It was found that removing a couple pins would allow the gear to be inserted after painting, making the early yellow painting a little less necessary.
Photo 1 - A lot of clamps were needed to join the two fuselage halves.
Photo 2 - Incorrect ribbing texture on the wings needs to be removed.
Photo 3 - Ribbing removed from the wings
Photo 4 - Before(top) and after (bottom) showing ribbing texture
That’s it for another month. There has been a lot of thought on the next section of railway, with plans drawn up but no new contruction. Sounds like something to include in the next update.
That’s it for another month. Take care and stay safe.


Comments