Some old, some new
- paddleriver
- Dec 13, 2020
- 6 min read
A cold, sunny winter Sunday morning. Might be the coldest day this winter. It was -28C when I got up. Marie is trying hard to finish some Christmas sewing so she can get it into the mail. A perfect time for a blog update.
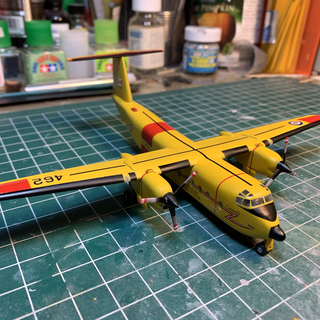
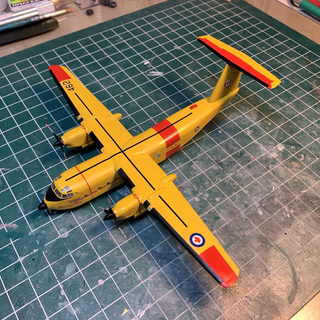
Buffalo
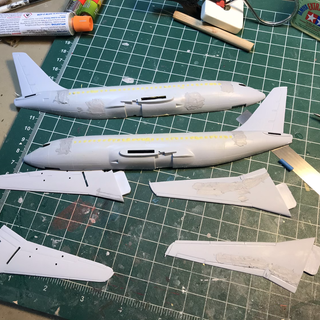
The Buffalo is finished, and I am very pleased with how it turned out.


A220
The A220 is on hold. I am not happy with the decals. There are several issues that frustrate me.
the red maple leaves are supposed to be placed over a white underlay. The red leaves are just slightly smaller than the white ones, meaning that the white underlay shows no matter how hard you try to line them up.
the cockpit decal disappears against the black band.
the black “Air Canada” wording isn’t dense enough so it appears to be a dark grey rather than a black.


I really like the photoreal cabin windows. I began noticing these on the online forums earlier this year. There seem to be two companies that make them. One is Authentic Airliners, located in Europe. They are very, very nice with a price to match. More importantly, for someone who wants them quickly, they aren’t currently shipping because of the COVID pandemic. I found another company called 8A Decals that also sell photoreal cockpit and cabin windows. While browsing their site, I discovered they also produce decals for an Air Canada A220. For $11 I figured I would give them a try. A order was placed for cabin window decals and for the A220 decals. I have confirmation they have shipped. Hopefully they arrive soon, allowing work to resume.
So that leaves time to start planning the next models. My next up list is fairly long, including an Airfix Sea Fury and Mustang, an Eduard Mustang, the Tamiya Spitfire, and a FRSN CL-44. There is also a Dash 7, a Caribou, multiple 737 and DC-3 kits, and a couple of versions of the CRJ family waiting at the top of the pile. i really want to get going on the CL-44, in Flying Tigers colours no less. I was excited when this kit came out late last year, as these markings have fascinated me for as long as I can remember. But FRSN is know for esoteric kits vs quality ones. The kit is pretty basic, and pretty rough, with multiple short shots and surface texture reminiscent of a vac kit. I was looking for something simpler, so it can wait. My display shelves have enough green and brown camouflage, so another WWII kit could also wait. I have 5 Airfix 737 kits (yes - 5! And I have markings for 3 different Pacific Western, 2 different CP Air, and three different Canadian.) The kit itself certainly meets the need for simple. So I settled on a 1/144 Airfix 737-200 in Pacific Western colours as one. The other was easy. I got an 1/48 Accurate Miniatures Grumman Avenger from Dave last year as a combined Christmas and birthday gift (thanks Dave!). Definitely not green and brown!
Airfix 737
This is the now very old Airfix 737 kit, first brought out something like 40 years ago. It was recently rereleased with Southwest decals. As noted earlier, I have collected several sets of decals for 3 different Pacific Western schemes, as well as multiple CP Air and Canadian schemes. The blue tail Pacific Western scheme is iconic, and the one I think of first. So that’s what I decided on.
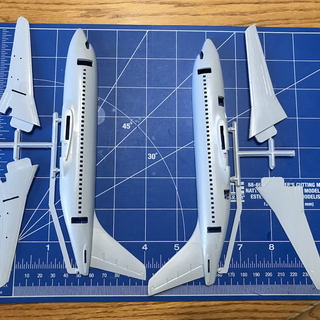
Here’s the kit. Two sprues and decals for Southwest and Brittannia.


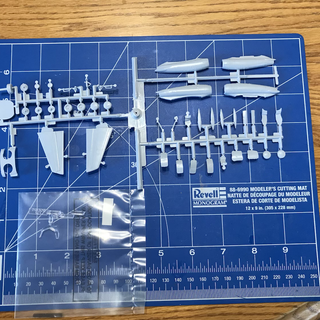


Internet research indicates that the kit has a number of short comings.
The nose is apparently wrong, but I can’t see it when compared to pictures. There are several very expensive resin replacements available. It looks close enough for me so I will not do anything to correct anything on the nose.
The kit has raised panel lines. I am still debating whether to just sand them off, or rescribe the lines.
The kit has openings for cabin and cockpit windows, but only has a clear plastic insert for the cockpit. I recall building this kit 40+ years ago, and leaving the cabin windows open. This time I will fill them in and use decals for the windows. Still trying to figure out how to fill the holes in.
The kit has openings for the cabin and cargo doors, and they apparently don’t fit well. I will glue these closed, use lots of filler, sand them smooth and use decals to represent the various openings.
The gear bays are too shallow. I can live with this.
The engines are for a 737-100. This is actually noticeable once you know What to look for. The -100 engines are smaller in diameter, shorter in length, and the pylon connecting the engine to the wing is much thinner. I have an article where someone kitbashed the proper engines from the kit engines, and it was a lot of work. BraZ makes reasonably priced resin replacements, and I acquired a number of sets a while ago.
The BraZ replacement engines.


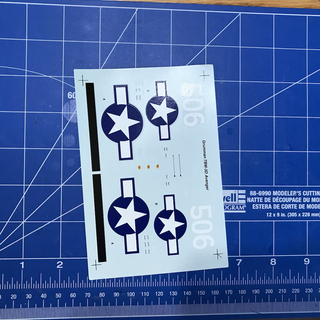
I have two different decals sets for the blue tail PWA scheme over the years. The first set are from Fowler. They are in very good condition given they are probably more than 40 years old. The drawback is that they don’t include any representation for the windows. The second decal set is much more recent, from Draw Decals. I found these by chance this summer. They require the blue tail and cheat stripe to be painted, but the door outlines are the correct colours. It gives more choice for registrations. I am always nervous when dealing with 40 year decals. They can work perfectly, or shatter into a thousand piecs the second they touch water. I bought a set for insurance.


I have also bought decal details from Nazca Decals that really help add character to a finished model. I discovered Nazca a while ago when I was looking for Air Canada decals for a Dash 8. The sheet includes things like vents and scoops, as well as flap outlines and all the doors. It also included a full set of cockpit and cabin windows, which would have been necessary for the Fowler decal set.
I am thinking that I will try and paint the blue areas. That should prove to be an interesting masking experience. I am hoping I can scan the Fowler decals, then trace them in my cutter software to create masks. I am thinking I would use this mask as a pattern to define the blue area, then use tape to mask around it, remove the pattern, and then paint. Time will tell if that works.
I have been trying to find pictures of the tops of the wings. The Fowler paint guide shows a Corroguard section on the wings, while the Draw Decal set specifically says that the wings are overall grey. Google has failed me so far, as I cannot find a decent shot of the upper wing areas. There is a 737 in Edmonton (Villeneuve actually) in PWA colours, donated by Air Canada to the Alberta Aviation Museum. It is a former PWA plane, absorbed into Air Canada when they bought Canadian Airlines. For an unknown reason, it was repainted into a representative PWA scheme. The most noticeable difference is that the belly and engines are white rather than the natural metal I distinctly remember. There are pictures of the wing tops for this plane, but I don’t know if they are correct. I have also found pictures of upper wings on the two tone light/blue scheme used before the merger with Canadian. Thred different pictures show three different patterns. So the wing surfaces are apparently plane specific, or perhaps were altered when they were repainted into the new scheme. I rather like the Corrogard surface, so am thinking that is what I will do.
The first step was to plug the windows. I decided to try using Milliput epoxy, a two part solid that is kneaded together. I rolled the mixed epoxy into worms, placed on the inside, and pushed the epoxy thru the openings. Excess on the outside was trimmed with a knife, and a wet cloth used to clean up. The kit man and cargo doors were glued into place and a layer of putty added to close the gaps.
I decided to remove the raised detail from the wings. The Nazca decals include the spoilers, so I filled the kit lines with putty. I then deepened the lines for the leading and trailing edge flaps. I set all the parts aside to dry. Here’s where things sit after a couple hours.

Grumman Avenger
The other kit will be the 1/48 Accurate Miniatures Grumman Avenger. Dave gave me this kit last year for a combined Christmas and birthday present. He included an Eduard photoetch fret for the interior, and a Belcher Bits conversion set for a RCN Avenger with the extended canopy greenhouse. I am thinking I will do this up in the two tone grey scheme, with the large NAVY lettering along the fuselage rear. I am going to try and cut masks for the lettering and numbering. I may get really enthusiastic and try to create masks for the roundels.
Accurate Miniatures are known for beautiful kits but poor instructions. That seems to hold true here. Here’s the kit.


The instructions


The Eduard photoetch


And finally, the Belcher Bits resin and decals.


Internet research shows this is a straightforward build, and the Belcher instructions are very good. Cutting the canopy out looks tricky, but they give you two - just in case.


Comments